Running a report will populate a Google Sheet in your Drive account with all of the configured information.
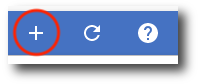
1. Navigate to Reports. Then, click Add in the top right corner.
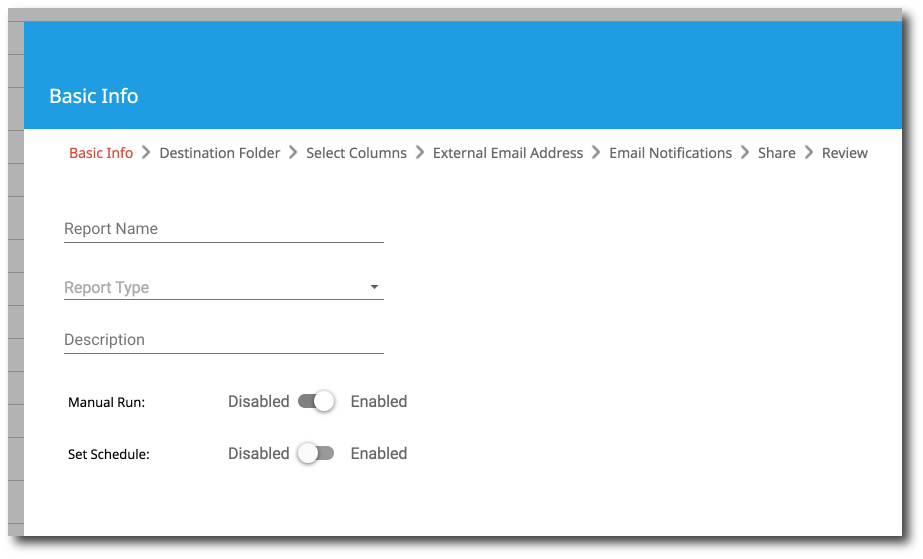
2. The report configuration window will be displayed beginning on the Basic Info screen. Here you will enter the following information:
-
Report Name: Desired name of the configured policy.
-
Report Type: Select "New User Creation"
-
Description: Provide an optional description as to what the policy is configured for.
-
Manual Run: Enable manual run if you want to manually decide when to run the report.
-
Set Schedule: Enable set schedule if you want to set a schedule for the report to run automatically.
Once you have configured the basic information, click Next to proceed.
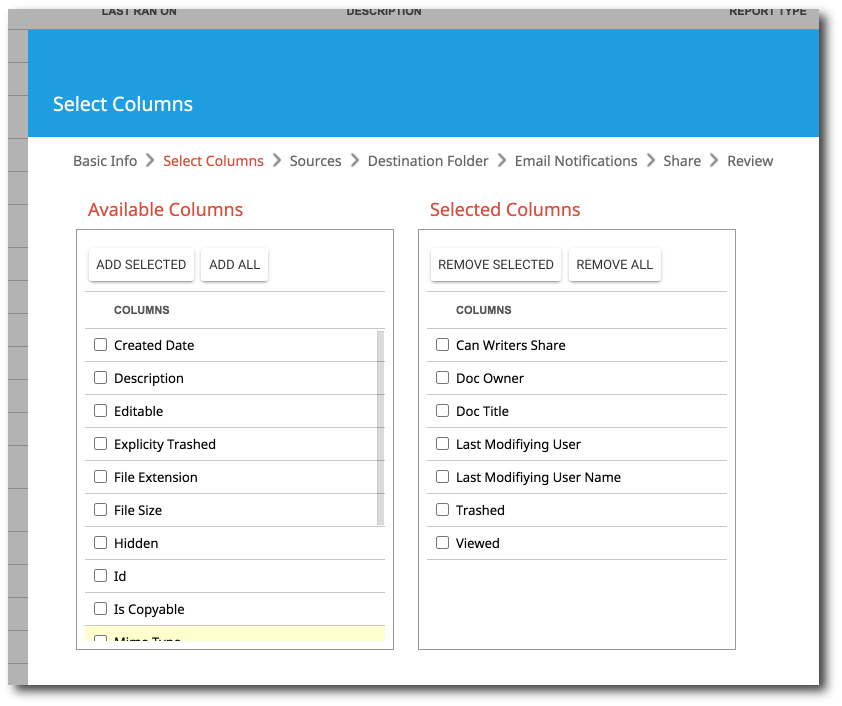
3. Depending on which report type you select, the next sections that appear in your configuration will vary. Below is an overview of each section:
Select Columns: This is where you select which columns you want to be included in the report. These are the columns that will be displayed in the Google Sheet. You can add all columns or select specific columns to include.
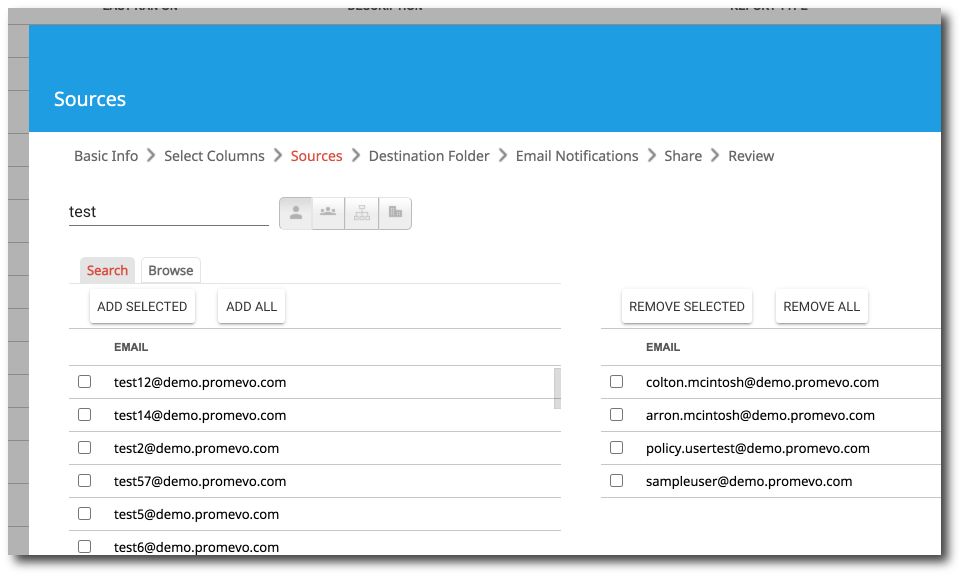
Sources: This is where you select which columns you want to be included in the report. These are the columns that will be displayed in the Google Sheet. You can add all columns or select specific columns to include.
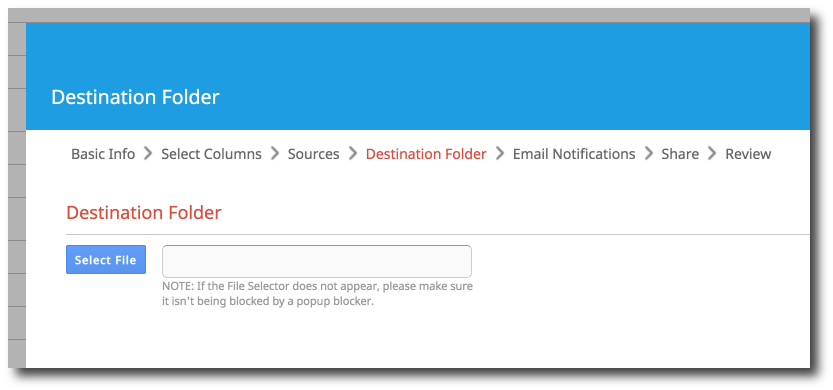
Destination Folder: This is where you select which columns you want to be included in the report. These are the columns that will be displayed in the Google Sheet. You can add all columns or select specific columns to include.
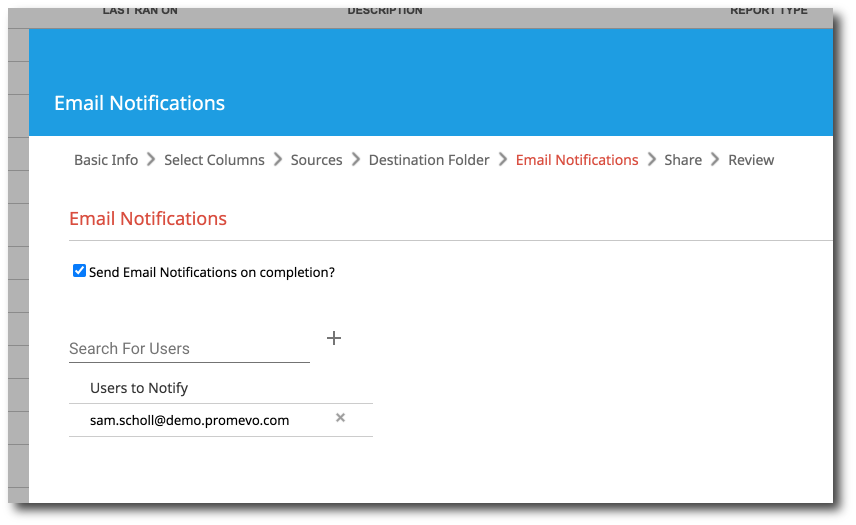
Email Notifications: This is where you can choose to send email notifications on completion of the report. You can select users by searching for their name and clicking the add icon. You can remove users by clicking the X next to their name.
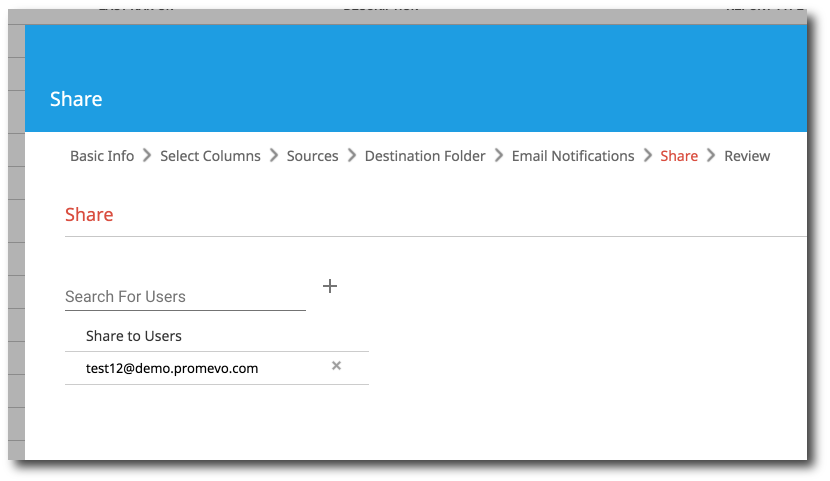
Share: This is where you can choose to share the report with other user(s). You can select users by searching for their name and clicking the add icon. You can remove users by clicking the X next to their name.
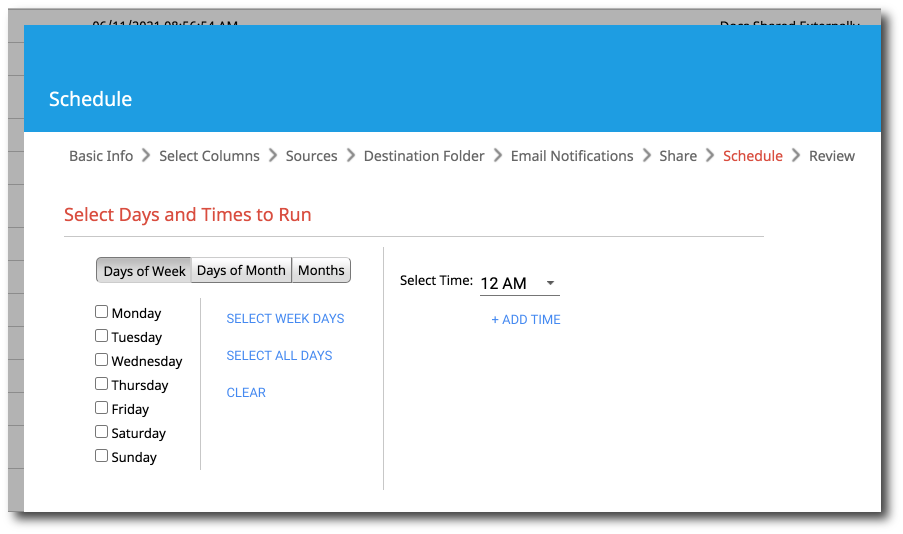
Schedule: If you chose to run the report on a set schedule, this is where you configure the schedule. Select either the days of the week, the days of the month, or months you would like the policy to be run. Then select the time of day from the "select time" drop-down menu. You can add multiple times for it to run by clicking +Add Time.
For Example: If you wanted to run a force password change policy on the first of the month, but only every 3 months, you would select the 1st of the month in Days of the Month, then which months you wanted it to run under Months.
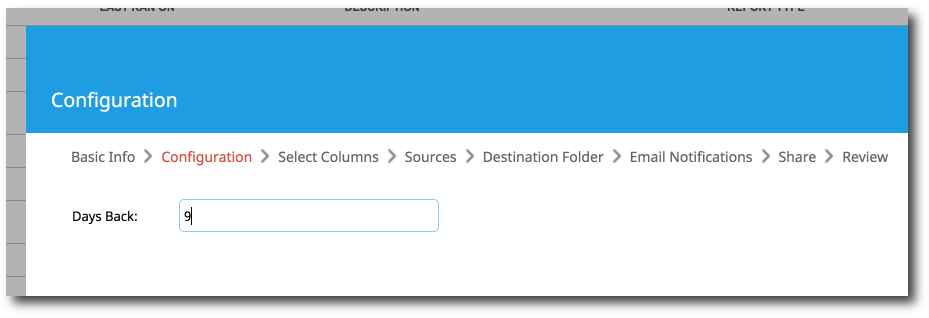
Configuration: This will only show when creating a "Docs modified in last X days" report. In the configuration section, enter the number of days you would like the report to go back on. For example, with the screenshot below the report would pull all docs modified in the last 9 days.
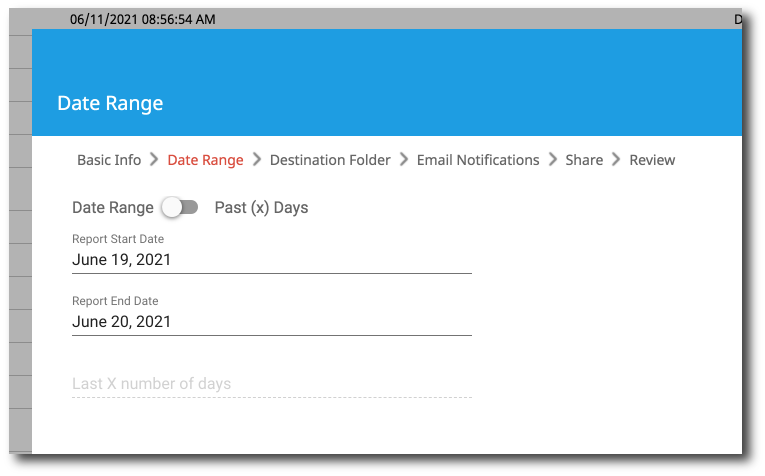
Date Range: Certain reports require you to select a date range for the report to start and end on. Enter the start date and end date in the corresponding fields. You can also switch the toggle to "Past (x) days" to have the report run on a certain number of days.
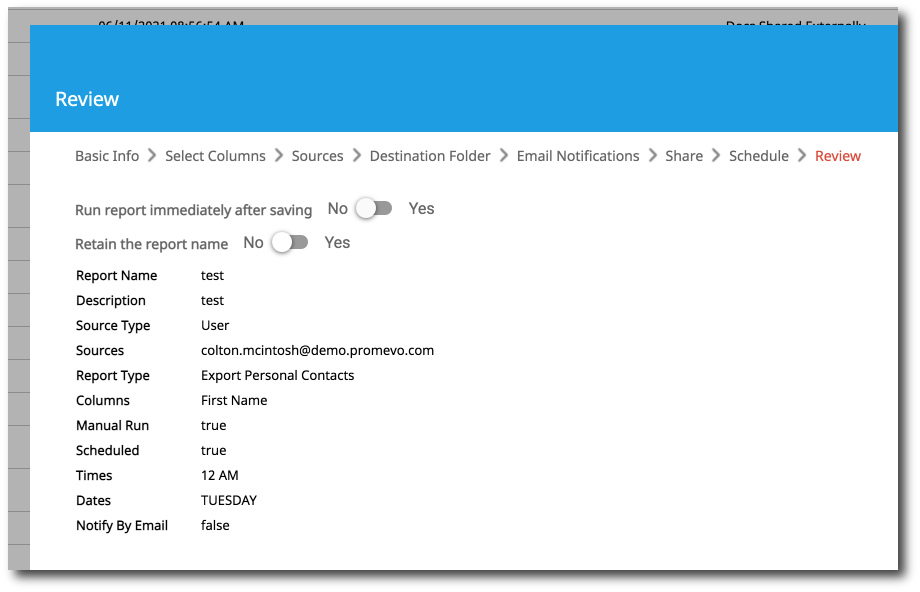
4. The final step is the Review screen. All of the information about the new report will be displayed. If you would like to run the report immediately after saving, switch the corresponding toggle to yes. Once you have reviewed the information, click Submit to create the new report.