Before you begin
A calendar transfer in gPanel will transfer all non-private future events with at least 1 guest or resource from one user to another.
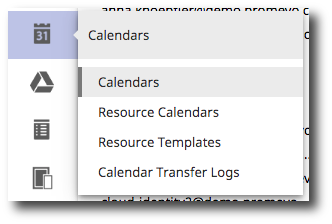
1. On the left side navigation, hover over Calendars and click Calendars.
If you do not see a menu like the one below, you may be currently set as a "User" within gPanel. If that's the case, you'll need to ask your domain administrator for access to gPanel. Especially if you are planning to complete more admin actions in the future.
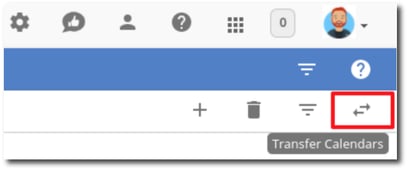
2. Select the source user to wish to use for the calendar transfer. This is the user that the calendar will be transferred from.
3. Once you select a user, click the Transfer Calendars icon at the top right corner of the page.
3. Once you click on the Transfer Calendars icon, the Transfer Ownership popup appears. The original user’s email address will be filled in based on the selected user. Fill in the New User field with the email address of the user you would like to transfer the Calendar events to.
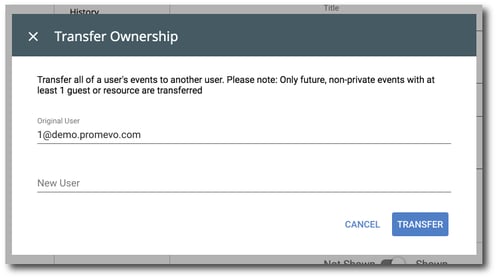
4. Click Transfer to initiate the transfer. The events from the original user will begin transferring over to the new user.
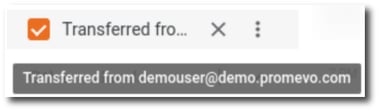
5. Once the transfer is complete, the new user will see a calendar in their Google Calendar under "My Calendars" titled "Transferred from [previous user's email address]". The original user's events will show up on the new user's primary calendar view as a different color. The original user will be able to turn off and on the view of the events by checking and unchecking the box next to the transferred calendar.